One of the greatest things that Google has to offer educators is the ability to create multiple calendars. If you teach 2 different classes, say Spanish I and Spanish II, then you can create a calendar for your students for each of those classes. Below is a tutorial on how to accomplish that.


Tutorial
1. Make sure you are logged into your Google Apps account and on your personal calendar.
2. Click on your "Gear" icon and then select the "Calendar Settings" option.
3. Choose the "Calendars" tab at the top.
4. Find and click the "Create new calendar" button.
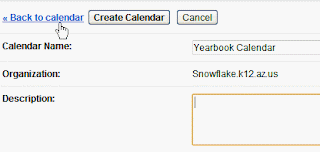
5. Give your class calendar a name. In this example I am creating a calendar for my Yearbook Class.

6. This is important and has been a pain for those who skip this step. Make sure you calendar is set to the right time zone. If you don't you might find that your time and that of your students doesn't quite work together.

7. This is also an important step so that your students can see you calendar events, you need to check the "Share this calendar with others" check box and then make sure that the "Make this calendar public" box is check and then make sure the drop down box displays "See all event details." These options will ensure that your students will be able to view the assignments you are about to give them.

8. If you would like to do an automatic share with certain people like you supervisor then just type his/her email address here and then click the "Add Person" button.

9. Once you are all done playing with the settings, click the "Create Calendar" button.
10. You will now be taken back to your main calendar and from there you can see that your new calendar has been added.
Make sure you see the other posts that will be coming out about how your students can get access to class calendar as part of their personal Google Calendar. Click here to find out how to embed your class calendar into your Google Site.
No comments:
Post a Comment